
[실습] WSL에서 리눅스(우분투) 설치
필기자
2026-05-07 15:39
881
0
본문
- WSL 소개
- 가상화 방식과의 비교
※ WSL의 한계와 본 강의에서의 위치
- WSL 사용 환경 확인
- PowerShell 관리자 권한으로 실행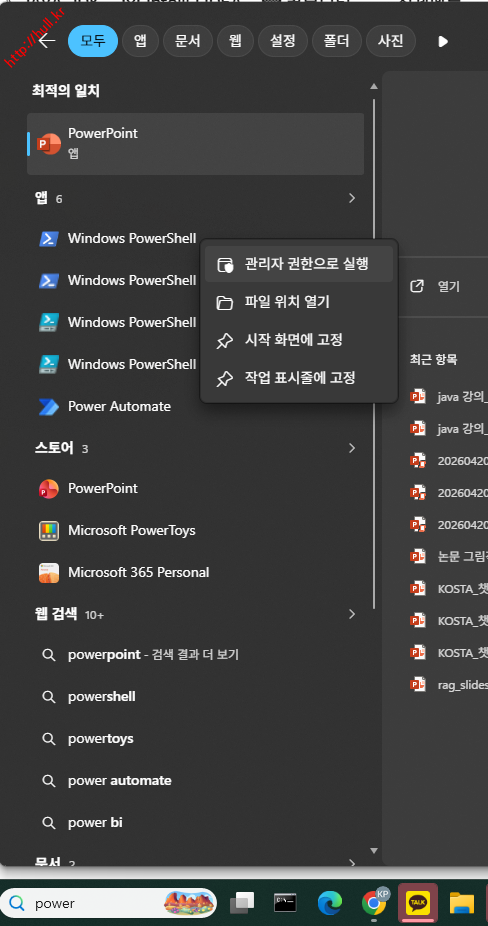
- WSL 자체 설치 (최초 1회)
- 시스템 재부팅 (WSL을 새로 설치한 경우)
- 설치 가능한 Ubuntu 배포판 목록 확인
- WSL 및 Ubuntu 24.04 설치
- Ubuntu 사용자 계정 생성
- WSL 버전 및 배포판 상태 확인
- PowerShell에서 Ubuntu 배포판 접속
- 패키지 업데이트 및 업그레이드
- SSH 서버 설치
- SSH 서버 활성화 및 시작
- SSH 서버 상태 확인
- WSL IP 주소 확인
※ WSL2 네트워크 특이사항
- 호스트에서 WSL2로 SSH 접속 테스트
※ 참고 ─ 여러 우분투 배포판 동시 사용 시 SSH 포트 충돌
- 두 번째 우분투의 SSH 포트 변경
- 변경된 포트로 SSH 접속 테스트
- WSL 정식 명칭: Windows Subsystem for Linux (Linux용 Windows 하위 시스템)
- 별도 가상 머신 소프트웨어나 듀얼 부팅 없이 Windows에서 Linux 환경을 직접 실행
- WSL1은 Linux 시스템 호출을 Windows API로 변환하는 호환 계층, WSL2는 Hyper-V 기반 경량 VM에서 실제 Linux 커널을 실행 (본 강의는 WSL2 기준)
- 가상화 방식과의 비교
| 항목 | WSL2 | VirtualBox | VMware Workstation |
|---|---|---|---|
| 가상화 방식 | Hyper-V 기반 경량 VM | 전체 가상화 (Type-2) | 전체 가상화 (Type-2) |
| 설치 | 명령어 한 줄 (wsl --install) | ISO + 디스크/메모리 수동 설정 | 라이선스 + ISO + 수동 설정 |
| 부팅 속도 | 1~2초 | 수십 초 ~ 수 분 | 수십 초 ~ 수 분 |
| 리소스 사용 | 동적 할당 (사용한 만큼) | 고정 할당 | 고정 할당 |
| 네트워크 | NAT 단일, 모든 배포판 IP 공유 | NAT / 브리지 / 호스트전용 / 내부망 자유 구성 | NAT / 브리지 / 호스트전용 / 사용자정의 자유 구성 |
| 호스트 통합 | 파일·명령 양방향 통합 | 공유 폴더 수동 설정 | 공유 폴더 + VMware Tools 설치 |
| GUI 데스크톱 | WSLg로 앱 단위 지원 (전체 데스크톱 X) | 완전한 데스크톱 환경 | 완전한 데스크톱 환경 |
| 주 용도 | 개발 · CLI 도구 · 빠른 Linux 환경 | 네트워크/시스템 학습, 다중 OS 운영 | 엔터프라이즈 가상화, 학습 |
※ WSL의 한계와 본 강의에서의 위치
- WSL은 Windows에서 Linux CLI 환경을 빠르게 쓰기엔 최적이지만, 네트워크/시스템 학습 측면에서는 제약이 큼
- 모든 배포판이 동일 NAT 네트워크와 단일 IP를 공유하므로 NAT 토폴로지, 포트 포워딩, 다중 인터페이스 시뮬레이션 등을 실습하기엔 부적합
- 클라우드 네이티브 구조(컨테이너 오케스트레이션, 서비스 메시, 마이크로서비스 간 네트워킹 등)를 깊이 학습하려면 VirtualBox/VMware로 다중 VM을 직접 구성하거나 실제 클라우드 환경(AWS, GCP 등)을 사용해야 함
- 본 강의 단계에서는 Raspberry Pi 기반 목업(mock-up) 시스템 구동이 목적이므로 WSL2의 단순 Linux 환경으로 충분
- 추후 네트워크/시스템 심화 학습 시 VirtualBox/VMware 환경으로 전환 권장
- WSL 사용 환경 확인
- Windows 10 버전 2004(빌드 19041) 이상 또는 Windows 11 사용
- 가상화 기술(VT-x / AMD-V) 활성화
- 최근 Windows 11 PC는 보통 기본 활성화되어 있어 별도 설정 불필요
- WSL 설치 중 가상화 관련 오류 발생 시에만 BIOS에 진입해 활성화 여부 확인
- 관리자 권한이 있는 계정으로 로그인
- PowerShell 관리자 권한으로 실행
- 시작 버튼 우클릭 후 [터미널(관리자)] 또는 [Windows PowerShell(관리자)] 클릭
- 또는 시작 메뉴에서 'PowerShell' 검색 후 [관리자 권한으로 실행]
- UAC 창이 뜨면 [예] 클릭
- WSL 자체 설치 (최초 1회)
- WSL 기능이 한 번도 설치되지 않은 시스템이라면 먼저 WSL 자체를 설치
- 가상 머신 플랫폼·Linux용 Windows 하위 시스템·WSL 커널이 함께 설치됨
- --no-distribution 옵션은 배포판 없이 WSL 본체만 설치 (배포판은 다음 단계에서 별도 선택해 설치)
- 이미 WSL이 설치된 환경(Windows 11 일부 기본 포함, 이전에 wsl 사용 등)에서는 이 단계를 건너뜀
- 설치 여부는 PowerShell에서 wsl --status 또는 wsl -l -v 명령으로 확인 가능
PS C:\WINDOWS\system32> wsl --install --no-distribution
설치 중: 가상 머신 플랫폼
가상 머신 플랫폼이(가) 설치되었습니다.
설치 중: Linux용 Windows 하위 시스템
Linux용 Windows 하위 시스템이(가) 설치되었습니다.
다운로드 중: WSL 커널
설치 중: WSL 커널
WSL 커널이(가) 설치되었습니다.
요청한 작업이 완료되었습니다. 변경 내용은 시스템을 다시 시작할 때까지 적용되지 않습니다.
가상 머신 플랫폼이(가) 설치되었습니다.
설치 중: Linux용 Windows 하위 시스템
Linux용 Windows 하위 시스템이(가) 설치되었습니다.
다운로드 중: WSL 커널
설치 중: WSL 커널
WSL 커널이(가) 설치되었습니다.
요청한 작업이 완료되었습니다. 변경 내용은 시스템을 다시 시작할 때까지 적용되지 않습니다.
- 시스템 재부팅 (WSL을 새로 설치한 경우)
- 가상 머신 플랫폼·Hyper-V 같은 Windows 기능 적용을 위해 재부팅 필수
- 재부팅 후 다시 PowerShell 관리자 권한으로 실행 후 다음 단계 진행
- 이미 WSL이 설치된 환경에서 이 강의를 따라하는 경우 이 단계는 건너뜀
- 설치 가능한 Ubuntu 배포판 목록 확인
- 설치 전 어떤 버전이 제공되는지 미리 확인
PS C:\WINDOWS\system32> wsl --list --online
다음은 설치할 수 있는 유효한 배포판 목록입니다.
'wsl.exe --install <Distro>'를 사용하여 설치하십시오.
NAME FRIENDLY NAME
Ubuntu Ubuntu
Debian Debian GNU/Linux
kali-linux Kali Linux Rolling
Ubuntu-18.04 Ubuntu 18.04 LTS
Ubuntu-20.04 Ubuntu 20.04 LTS
Ubuntu-22.04 Ubuntu 22.04 LTS
Ubuntu-24.04 Ubuntu 24.04 LTS
OracleLinux_7_9 Oracle Linux 7.9
OracleLinux_8_7 Oracle Linux 8.7
OracleLinux_9_1 Oracle Linux 9.1
openSUSE-Leap-15.6 openSUSE Leap 15.6
openSUSE-Tumbleweed openSUSE Tumbleweed
- WSL 및 Ubuntu 24.04 설치
- 아래 명령어 한 줄이면 WSL2 + Ubuntu 24.04 자동 설치
- 옵션 -d 뒤에 원하는 배포판 이름 지정
- 기본값(wsl --install)으로 실행 시 최신 LTS Ubuntu가 설치됨
PS C:\WINDOWS\system32> wsl --install -d Ubuntu-24.04
다운로드 중: Ubuntu 24.04 LTS
설치 중: Ubuntu 24.04 LTS
배포가 설치되었습니다. 'wsl.exe -d Ubuntu-24.04'을(를) 통해 시작할 수 있습니다.
Ubuntu-24.04 시작하는 중...
Provisioning the new WSL instance Ubuntu-24.04
This might take a while...
설치 중: Ubuntu 24.04 LTS
배포가 설치되었습니다. 'wsl.exe -d Ubuntu-24.04'을(를) 통해 시작할 수 있습니다.
Ubuntu-24.04 시작하는 중...
Provisioning the new WSL instance Ubuntu-24.04
This might take a while...
- Ubuntu 사용자 계정 생성
- 설치 명령 실행 직후 자동으로 사용자 이름과 비밀번호를 묻는 프롬프트가 출력됨 (별도 단계 없이 같은 PowerShell 창에서 이어짐)
- 사용자 이름(Unix username) : pi
- 비밀번호(password) : 123456
- 비밀번호 입력 시 화면에 *나 글자가 표시되지 않음 (보안상 정상 동작)
- 입력 완료 후 곧바로 우분투 bash 프롬프트로 진입
Create a default Unix user account: pi
New password:
Retype new password:
passwd: password updated successfully
To run a command as administrator (user "root"), use "sudo <command>".
See "man sudo_root" for details.
pi@DESKTOP-PC:/mnt/c/WINDOWS/system32$
New password:
Retype new password:
passwd: password updated successfully
To run a command as administrator (user "root"), use "sudo <command>".
See "man sudo_root" for details.
pi@DESKTOP-PC:/mnt/c/WINDOWS/system32$
- WSL 버전 및 배포판 상태 확인
- PowerShell에서 설치된 배포판과 WSL 버전 확인
- VERSION 항목이 2로 표시되어야 정상 (WSL2)
- STATE에 Running 표시되면 실행 중인 상태
PS C:\WINDOWS\system32> wsl -l -v
NAME STATE VERSION
* Ubuntu-24.04 Running 2
* Ubuntu-24.04 Running 2
- PowerShell에서 Ubuntu 배포판 접속
- 설치된 Ubuntu에 접속하는 방법은 세 가지
- 방법 1: 시작 메뉴에서 'Ubuntu 24.04' 검색 후 클릭
- 방법 2: PowerShell에서 wsl 명령어 실행 (기본 배포판 자동 접속)
- 방법 3: PowerShell에서 wsl -d 옵션으로 특정 배포판 지정해 접속
- 접속 후 프롬프트가 PowerShell에서 우분투 프롬프트(pi@DESKTOP-PC:~$)로 변경됨
- 우분투 세션에서 빠져나오려면 exit 또는 Ctrl+D 입력
PS C:\WINDOWS\system32> wsl
PS C:\WINDOWS\system32> wsl -d Ubuntu-24.04
Welcome to Ubuntu 24.04 LTS (GNU/Linux 5.15.153.1-microsoft-standard-WSL2 x86_64)
* Documentation: https://help.ubuntu.com
* Management: https://landscape.canonical.com
* Support: https://ubuntu.com/pro
Last login: Thu May 7 14:22:18 2026
pi@DESKTOP-PC:~$
* Documentation: https://help.ubuntu.com
* Management: https://landscape.canonical.com
* Support: https://ubuntu.com/pro
Last login: Thu May 7 14:22:18 2026
pi@DESKTOP-PC:~$
- 패키지 업데이트 및 업그레이드
- 최신 보안 패치 및 패키지 적용
- sudo 입력 후 위에서 설정한 비밀번호(123456) 입력
pi@DESKTOP-PC:~$ sudo apt update
pi@DESKTOP-PC:~$ sudo apt upgrade -y
[sudo] password for pi:
Hit:1 http://archive.ubuntu.com/ubuntu noble InRelease
Get:2 http://security.ubuntu.com/ubuntu noble-security InRelease [126 kB]
Get:3 http://archive.ubuntu.com/ubuntu noble-updates InRelease [126 kB]
Get:4 http://archive.ubuntu.com/ubuntu noble-backports InRelease [126 kB]
Get:5 http://security.ubuntu.com/ubuntu noble-security/main amd64 Packages [285 kB]
Get:6 http://archive.ubuntu.com/ubuntu noble-updates/main amd64 Packages [412 kB]
Fetched 1,075 kB in 2s (538 kB/s)
Reading package lists... Done
Building dependency tree... Done
Reading state information... Done
24 packages can be upgraded. Run 'apt list --upgradable' to see them.
Reading package lists... Done
Building dependency tree... Done
Reading state information... Done
Calculating upgrade... Done
The following packages will be upgraded:
base-files bash bsdutils coreutils dpkg libc-bin libc6 libssl3t64 ...
24 upgraded, 0 newly installed, 0 to remove and 0 not upgraded.
Need to get 18.4 MB of archives.
After this operation, 512 kB of additional disk space will be used.
...
Processing triggers for libc-bin (2.39-0ubuntu8.3) ...
- SSH 서버 설치
- 외부에서 SSH로 접속하기 위해 OpenSSH 서버 패키지 설치
pi@DESKTOP-PC:~$ sudo apt install openssh-server -y
Reading package lists... Done
Building dependency tree... Done
Reading state information... Done
The following additional packages will be installed:
ncurses-term openssh-sftp-server ssh-import-id
The following NEW packages will be installed:
ncurses-term openssh-server openssh-sftp-server ssh-import-id
0 upgraded, 4 newly installed, 0 to remove and 0 not upgraded.
Need to get 728 kB of archives.
After this operation, 6,124 kB of additional disk space will be used.
...
Setting up openssh-server (1:9.6p1-3ubuntu13.5) ...
Creating SSH2 RSA key; this may take some time ...
Creating SSH2 ECDSA key; this may take some time ...
Creating SSH2 ED25519 key; this may take some time ...
Created symlink /etc/systemd/system/sshd.service → /usr/lib/systemd/system/ssh.service.
Created symlink /etc/systemd/system/multi-user.target.wants/ssh.service → /usr/lib/systemd/system/ssh.service.
Processing triggers for man-db (2.12.0-4build2) ...
Processing triggers for ufw (0.36.2-6) ...
- SSH 서버 활성화 및 시작
- 부팅 시 자동 시작 등록 후 즉시 서비스 시작
pi@DESKTOP-PC:~$ sudo systemctl enable ssh
pi@DESKTOP-PC:~$ sudo systemctl start ssh
Synchronizing state of ssh.service with SysV service script with /usr/lib/systemd/systemd-sysv-install.
Executing: /usr/lib/systemd/systemd-sysv-install enable ssh
ssh.service is enabled.
Executing: /usr/lib/systemd/systemd-sysv-install enable ssh
ssh.service is enabled.
- SSH 서버 상태 확인
- SSH 서비스가 정상적으로 실행되고 있는지 확인
- 출력 결과에 active (running)이 보이면 정상 동작
- q 키를 누르면 상태 확인 화면을 빠져나옴
pi@DESKTOP-PC:~$ sudo systemctl status ssh
● ssh.service - OpenBSD Secure Shell server
Loaded: loaded (/usr/lib/systemd/system/ssh.service; enabled; preset: enabled)
Active: active (running) since Thu 2026-05-07 14:22:18 KST; 5s ago
Docs: man:sshd(8)
man:sshd_config(5)
Main PID: 1234 (sshd)
Tasks: 1 (limit: 9876)
Memory: 1.4M (peak: 1.6M)
CPU: 12ms
CGroup: /system.slice/ssh.service
└─1234 "sshd: /usr/sbin/sshd -D [listener] 0 of 10-100 startups"
May 07 14:22:18 DESKTOP-PC systemd[1]: Starting ssh.service - OpenBSD Secure Shell server...
May 07 14:22:18 DESKTOP-PC sshd[1234]: Server listening on 0.0.0.0 port 22.
May 07 14:22:18 DESKTOP-PC sshd[1234]: Server listening on :: port 22.
May 07 14:22:18 DESKTOP-PC systemd[1]: Started ssh.service - OpenBSD Secure Shell server.
- WSL IP 주소 확인
- WSL2는 호스트(Windows)와 별도의 가상 네트워크 대역을 사용
- WSL 인스턴스의 IP 주소를 확인
pi@DESKTOP-PC:~$ hostname -I
pi@DESKTOP-PC:~$ ip addr show eth0
172.20.123.45
2: eth0: <BROADCAST,MULTICAST,UP,LOWER_UP> mtu 1500 qdisc mq state UP group default qlen 1000
link/ether 00:15:5d:12:34:56 brd ff:ff:ff:ff:ff:ff
inet 172.20.123.45/20 brd 172.20.127.255 scope global eth0
valid_lft forever preferred_lft forever
inet6 fe80::215:5dff:fe12:3456/64 scope link
valid_lft forever preferred_lft forever
※ WSL2 네트워크 특이사항
- VirtualBox 브리지 모드와 달리 WSL2는 NAT 방식의 가상 네트워크를 사용
- 호스트 PC(Windows)에서는 자동 localhost 포워딩 기능 덕분에 별도 설정 없이 localhost(127.0.0.1)로 WSL2 접근 가능
- 외부 PC에서 WSL2로 직접 접속하려면 Windows 호스트에 포트 포워딩(netsh interface portproxy) 설정 필요
- WSL2의 IP는 재부팅 시마다 변경될 수 있음
- 호스트에서 WSL2로 SSH 접속 테스트
- PowerShell 또는 명령 프롬프트에서 localhost로 접속
- 최초 접속 시 호스트 키 신뢰 여부를 묻는 메시지가 나오면 yes 입력
- 접속 시 비밀번호(123456) 입력
PS C:\> ssh pi@localhost
The authenticity of host 'localhost (127.0.0.1)' can't be established.
ED25519 key fingerprint is SHA256:abc123def456ghi789jkl012mno345pqr678stu901vw.
This key is not known by any other names.
Are you sure you want to continue connecting (yes/no/[fingerprint])? yes
Warning: Permanently added 'localhost' (ED25519) to the list of known hosts.
pi@localhost's password:
Welcome to Ubuntu 24.04 LTS (GNU/Linux 5.15.153.1-microsoft-standard-WSL2 x86_64)
* Documentation: https://help.ubuntu.com
* Management: https://landscape.canonical.com
* Support: https://ubuntu.com/pro
Last login: Thu May 7 14:22:18 2026
pi@DESKTOP-PC:~$
※ 참고 ─ 여러 우분투 배포판 동시 사용 시 SSH 포트 충돌
- WSL2의 모든 배포판은 단일 가상 머신 안에서 같은 네트워크 인터페이스를 공유 (즉, 같은 IP 주소)
- 두 배포판이 모두 22번 포트로 SSH를 실행하면 먼저 시작한 쪽만 포트를 점유, 나중 쪽은 'Address already in use' 에러로 바인딩 실패
- 그 결과 localhost:22 접속 시 항상 22번을 먼저 잡은 쪽으로만 연결됨
- 여러 배포판에 동시 접속하려면 한쪽의 SSH 포트를 다른 번호로 변경해야 함
- 두 번째 우분투의 SSH 포트 변경
- /etc/ssh/sshd_config 파일에서 #Port 22 라인을 찾아 Port 2222 로 변경 (앞의 # 제거)
- 저장 후 SSH 서비스 재시작
pi@DESKTOP-PC:~$ sudo nano /etc/ssh/sshd_config
pi@DESKTOP-PC:~$ sudo systemctl restart ssh
[/etc/ssh/sshd_config 수정 부분]
# What ports, IPs and protocols we listen for
Port 2222
#AddressFamily any
#ListenAddress 0.0.0.0
#ListenAddress ::
# What ports, IPs and protocols we listen for
Port 2222
#AddressFamily any
#ListenAddress 0.0.0.0
#ListenAddress ::
- 변경된 포트로 SSH 접속 테스트
- Windows PowerShell에서 -p 옵션으로 포트 지정하여 접속
- 22번 포트는 첫 번째 우분투, 2222번 포트는 두 번째 우분투로 연결
PS C:\> ssh pi@localhost -p 2222
댓글목록0