
[실습] 라즈베리파이 파이썬 가상 환경 및 PC IDE 설정
필기자
2024-02-21 17:13
8,629
0
본문
라즈베리파이 파이썬 가상 환경 및 PC IDE 설정
목 적
1. PC에서 라즈베리파이 SSH 접속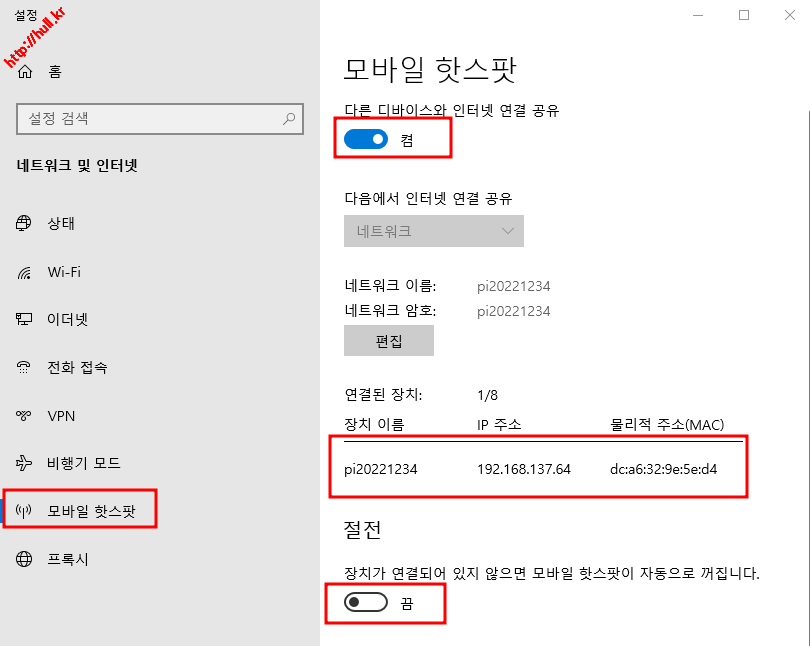

2. 파이썬 버전 확인 및 가상환경 설정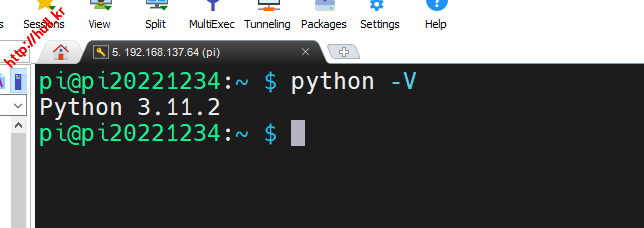
3. PC에서 VSCode 설치 및 SSH 접속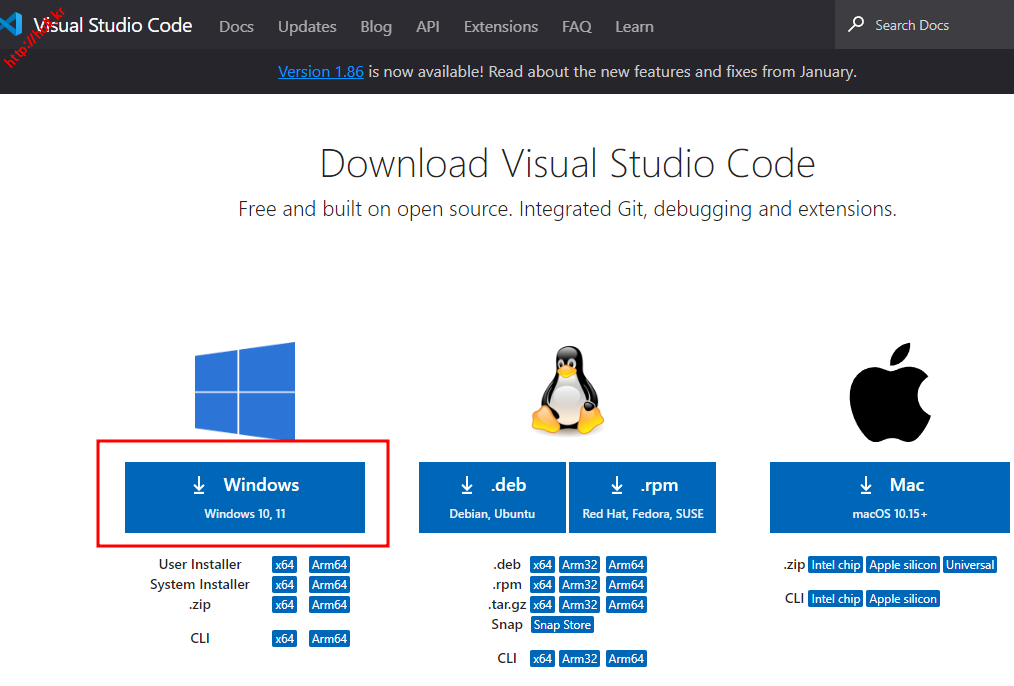
목 적
- 라즈베리파이에 파이썬 프로그래밍을 위한 가상환경 설정
- 파이썬 프로그래밍 격리된 공간을 확보하고 Golbal 파이썬 환경에 영향을 제한 함.
- 프로젝트별 의존성 관리 및 충돌 방지.
- 프로젝트마다 필요한 라이브러리, 버전 독립적으로 관리 가능.
- PC에서 라즈베리파 파이썬 개발을 위한 IDE 설치 및 설정
1. PC에서 라즈베리파이 SSH 접속
2. 파이썬 버전 확인 및 가상환경 설정
3. PC에서 VScode 설치 및 SSH 접속
2. 파이썬 버전 확인 및 가상환경 설정
3. PC에서 VScode 설치 및 SSH 접속
1. PC에서 라즈베리파이 SSH 접속
- 모바일 핫스팟 ON > 라즈베리파이 부팅 및 IP 확인
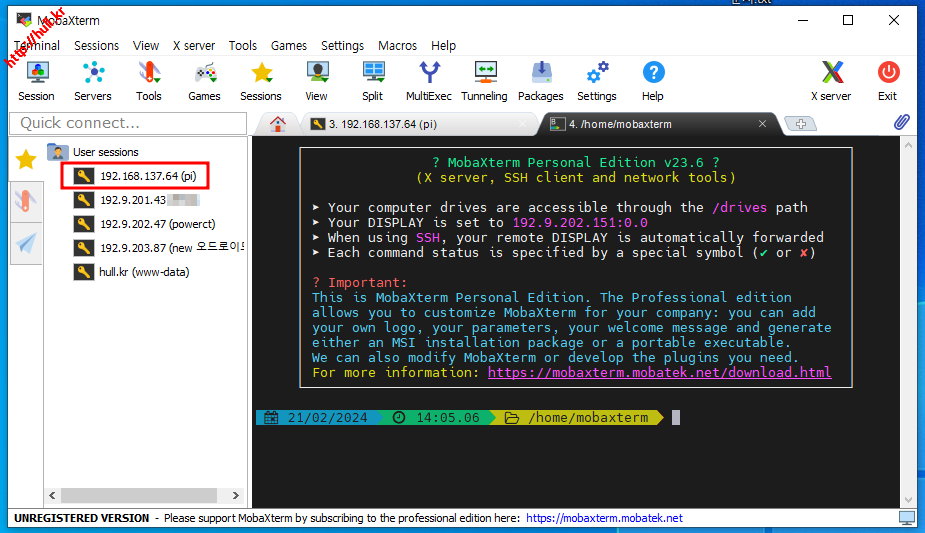
- MovaXterm으로 라즈베리 SSH 서버에 접속
2. 파이썬 버전 확인 및 가상환경 설정
- 파이썬 버전 확인
- python -V
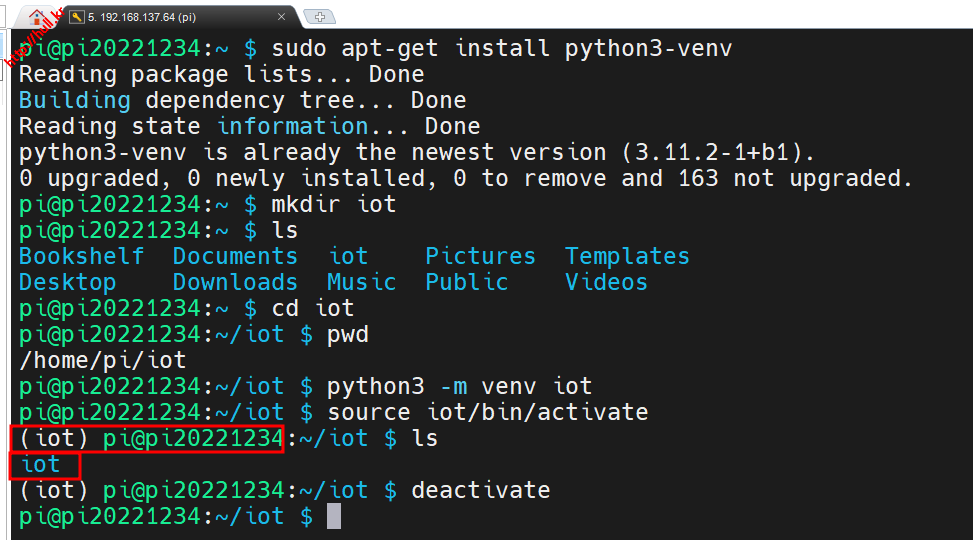
- 파이썬 가상환경 설정
- 가상환경 설정을 위한 패키지 설치 : sudo apt-get install python3-venv
- 가상환경 디렉토리 생성 및 이동 : mkdir iot > cd iot
- 가상환경 설정 : python3 -m venv iot
- 가상환경 활성화 : source iot/bin/activate
- 가상환경 비활성화 : deactivate
- 파이썬 가상환경 환경변수 등록
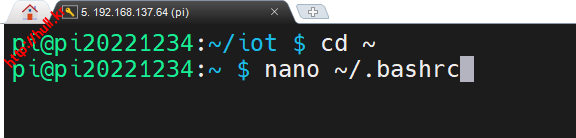
- 환경변수 등록을 위해 /home/pi/.bashrc 파일 수정
nano ~/.bashrc
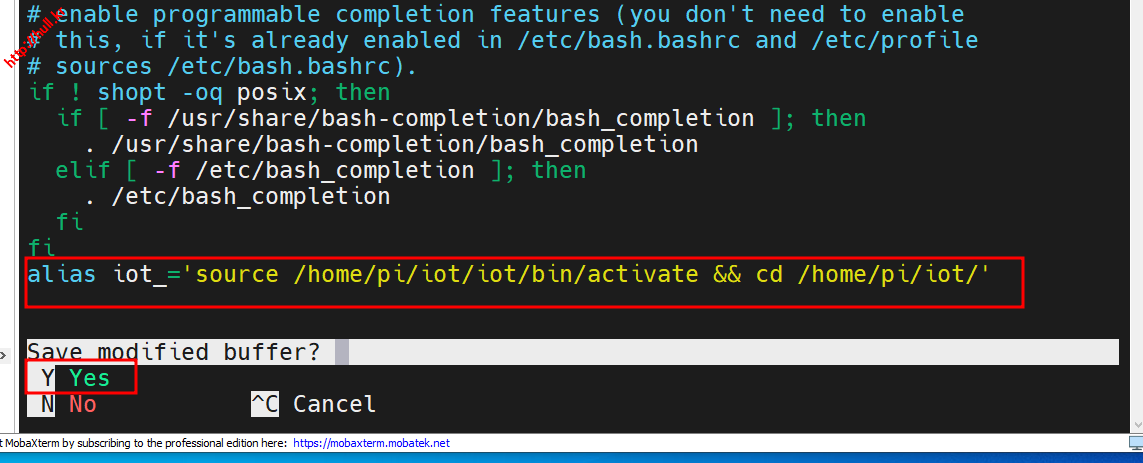
#제일 하단에 아래 내용 추가
alias iot_='source /home/pi/iot/iot/bin/activate && cd /home/pi/iot/'
#저장하고 나옴
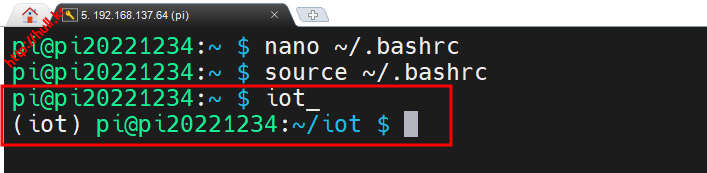
#환경변수 적용
source ~/.bashrc
#iot_ 명령어 입력시 가상환경 활성화 및 가상환경 폴더로 이등
iot_
3. PC에서 VSCode 설치 및 SSH 접속
- VSCode(Visual Studio Code) 다운로드 및 설치
- https://code.visualstudio.com/Download 다운로드 > 설치
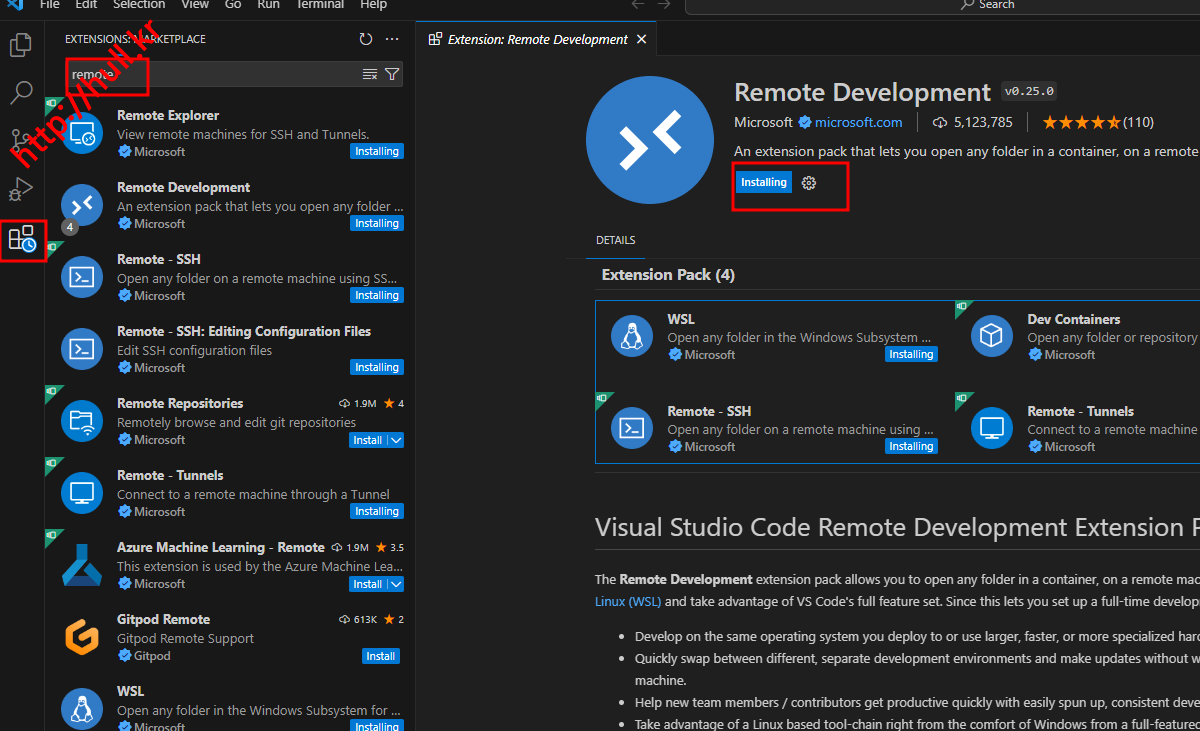
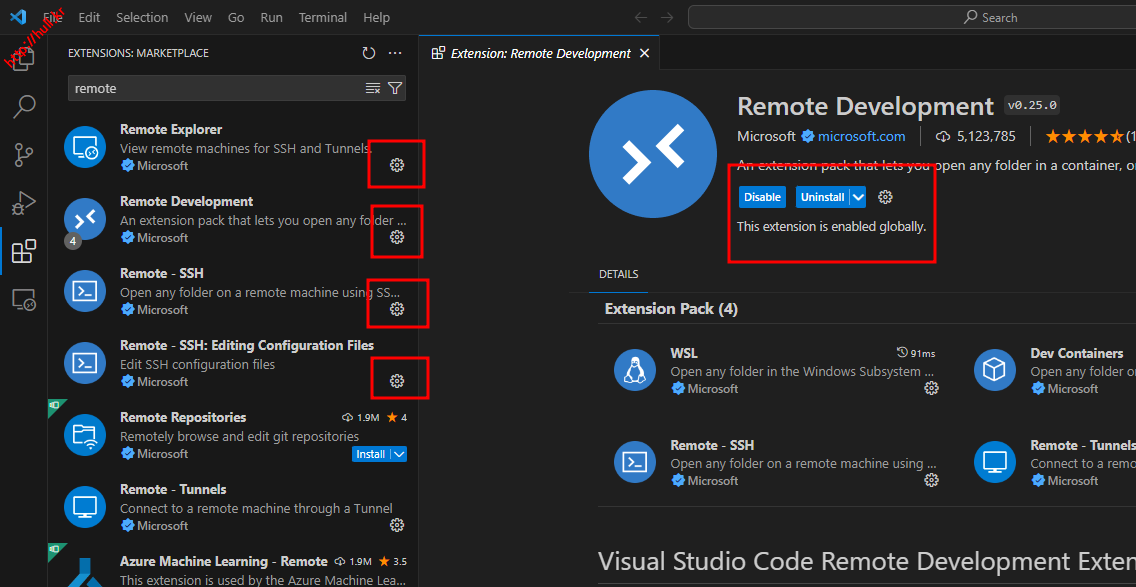
- VSCode SSH 클라이언트 설치
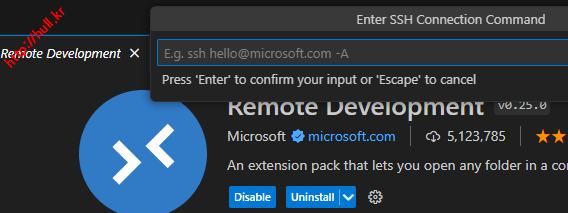
- Remote Development 설치 : 좌측 확장 아이콘 > remote 검색 > Remote Development Install
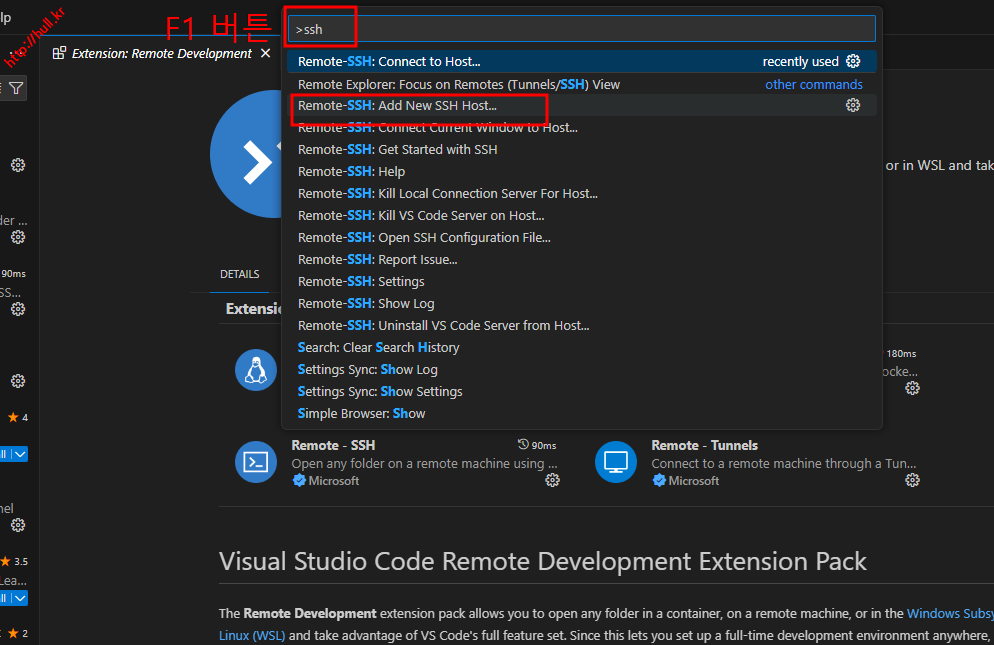
- VSCode SSH 클라이언트 설정
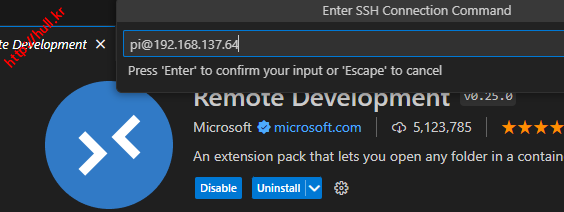
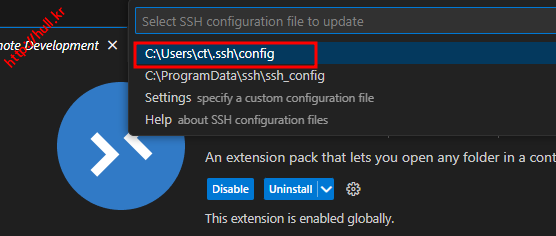
- SSH 설정 : F1 버튼 > ssh 검색 > Add New SSH Host 선택 > pi@라즈베리아이피 입력 > config 파일에 저장
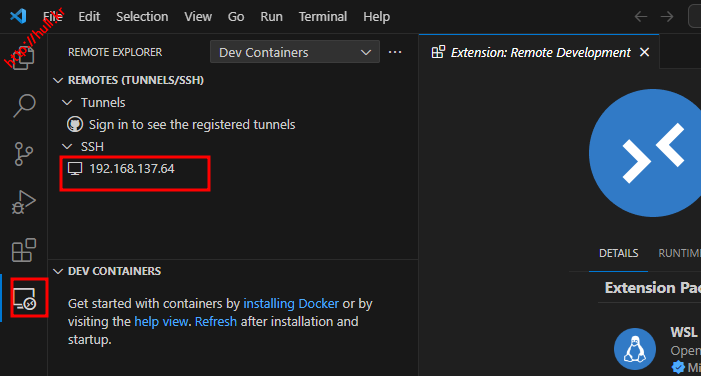
- VSCode에서 라즈베리파이 SSH 접속
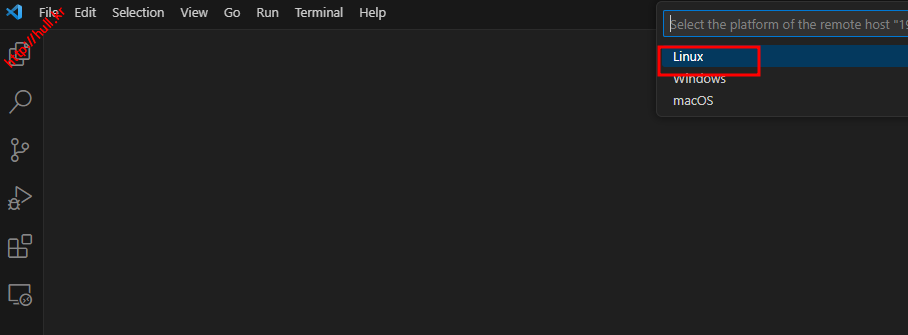
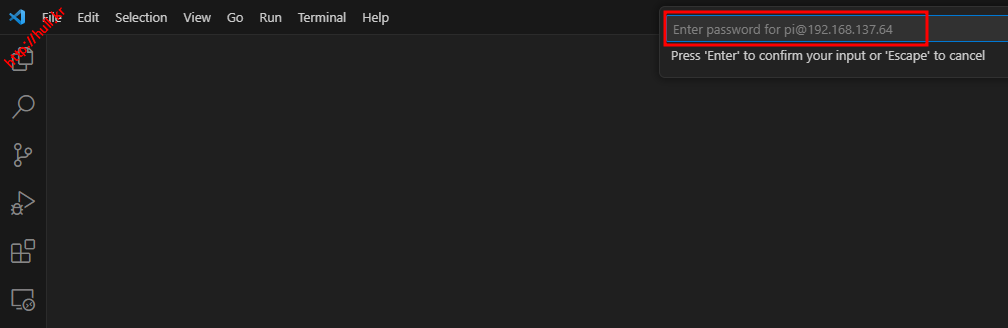
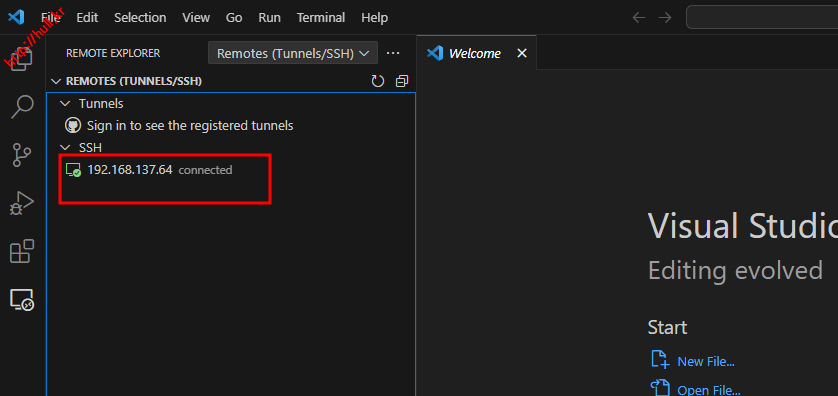
- 좌측 원격 아이콘 클릭 > REMOTES EXPLORER에서 라즈베리파이 아이피 클릭 > Linux 선택 >비밀번호 입력(123456) > 접속 확인
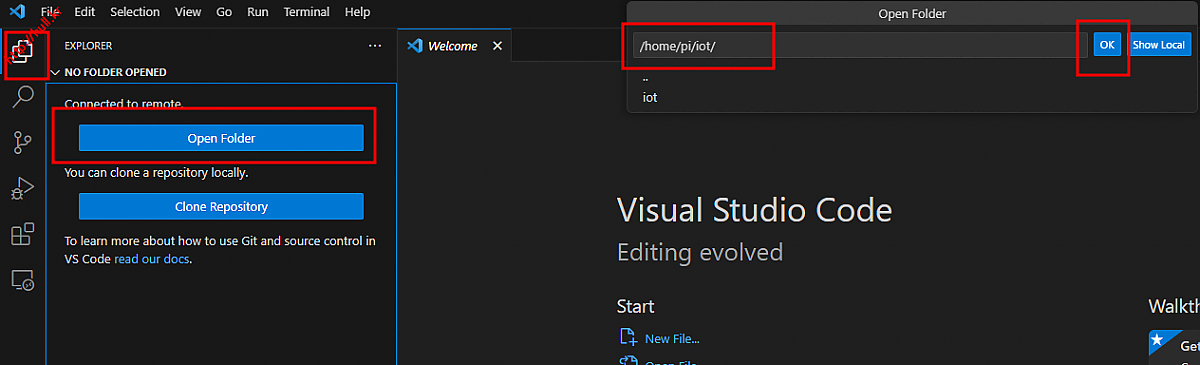
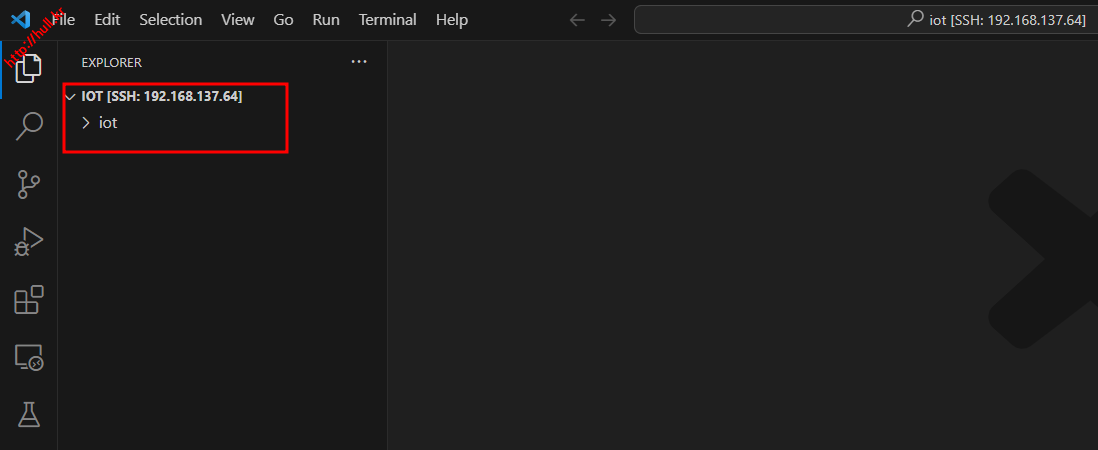
- 작업 폴더 열기
- 좌측 탐색기 아이콘 클릭 > Connected to remote > Open Folde 버튼 클릭 > /home/pi/iot/ 입력 > OK 버튼 클릭

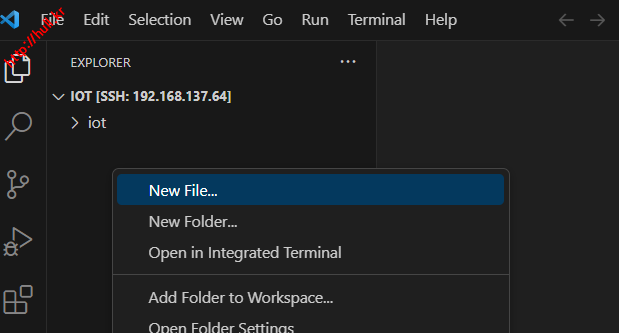
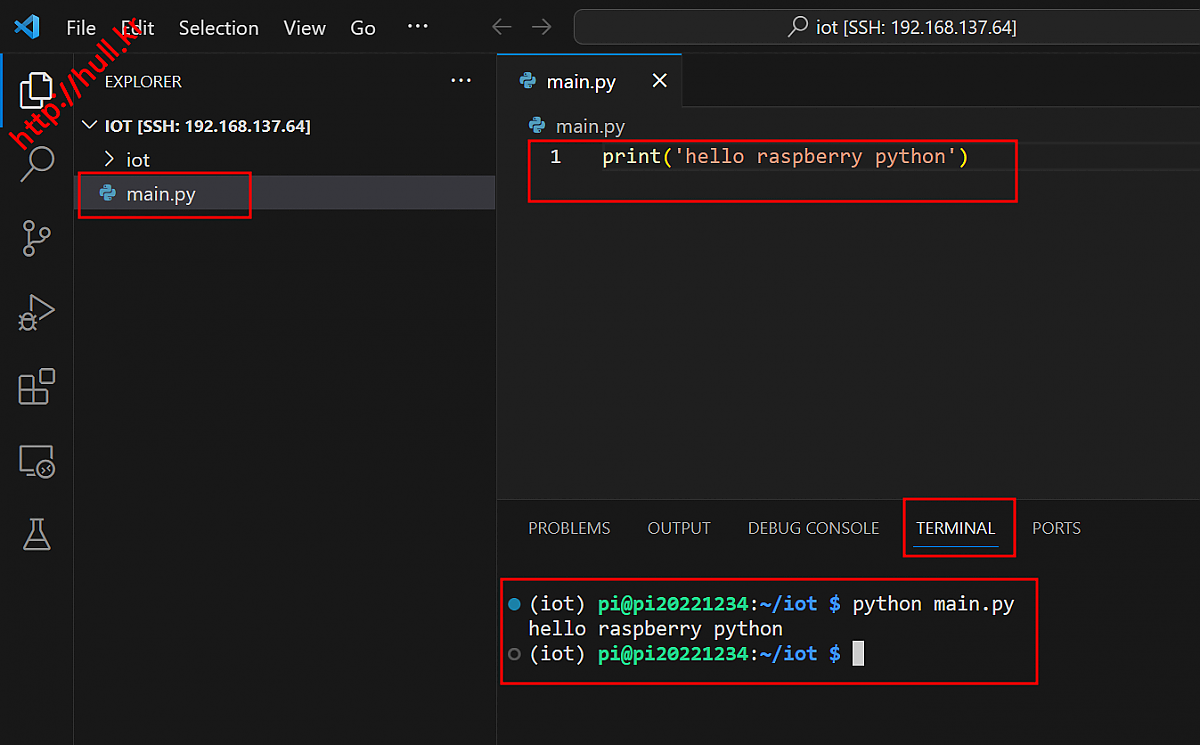
- 테스트 파일 생성 및 실행
- EXPLORER > 우클릭 > New File > main.py 생성 > 테스트 코딩 > 하단 TERMINAL > python main.py > 결과 확인
- 테스트 코딩 : print('hello raspberry python')
- EXPLORER > 우클릭 > New File > main.py 생성 > 테스트 코딩 > 하단 TERMINAL > python main.py > 결과 확인

댓글목록0